How to create your first Campaign
A step-by-step walkthrough of the Launch Your Program tab: every field, all four campaign types, and exactly what creators see when you publish.
By Nora Ellis, Affiliate Marketing & Creator Economy Writer · with Wooly Network, Advertiser Success · 31 August 2026 · 8 min · Marketplace Best Practices
Every campaign on Wooly Network is created in one place: the Launch Your Program tab in your advertiser dashboard. This guide walks through that form field by field, with a screenshot of each step, and explains the four campaign types you can choose from.
Before you start
Three things have to be in place before the Publish campaign button will turn on:
- An active plan. Launch Your Program is locked until you choose a plan. Your plan also sets how many campaigns you can run at the same time; if they are all in use, the form tells you and links you to end a campaign or upgrade. See which plan fits the number of campaigns you run.
- A finished brand profile. Creators read your brand details on the offer page, so the tab asks you to complete them first.
- Commission payment terms. Pick 30 or 60 days on Profile Info. Creators see this on your offer, so a campaign cannot be published without it.
The Launch Your Program tab
Open Launch Your Program from the left sidebar. The screen has two columns: the form on the left, and a live Marketplace preview on the right that updates as you type. Under the preview is a checklist of the four required sections; each one tells you exactly what it is still missing.
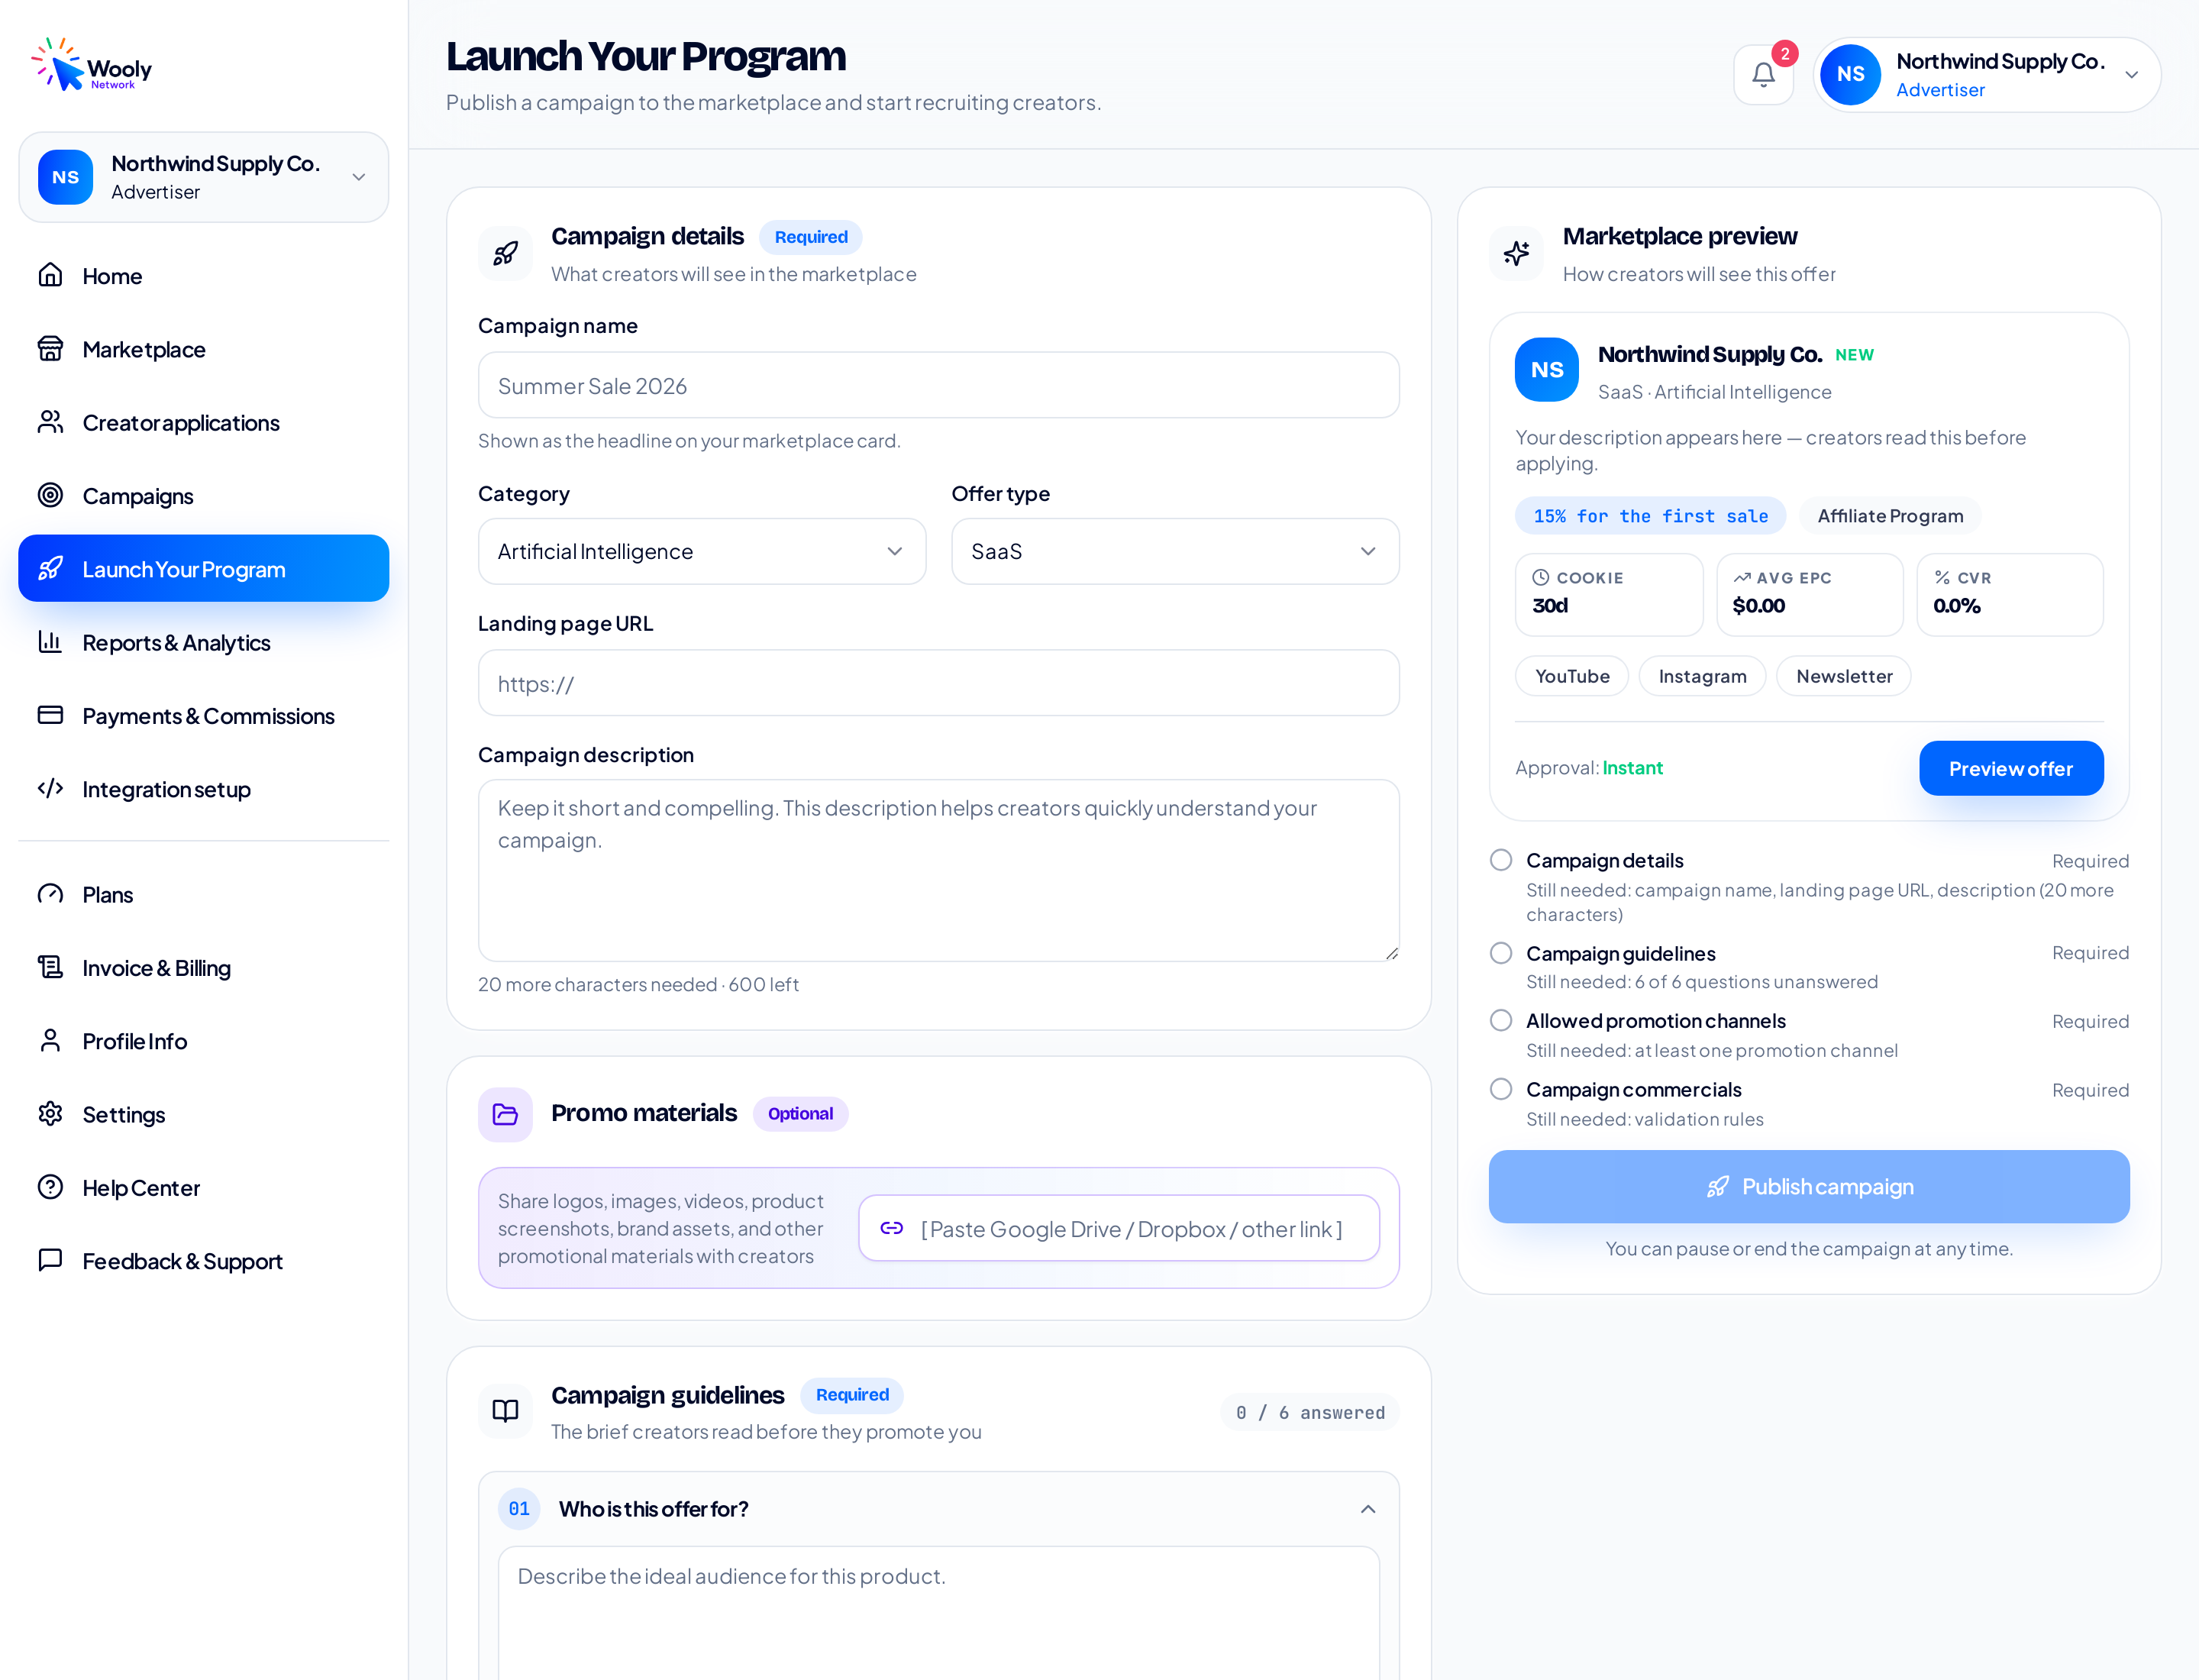
The empty form. The checklist on the right shows the four required sections and what each one still needs.
The four required sections are Campaign details, Campaign guidelines, Allowed promotion channels and Campaign commercials. Everything else on the page is optional.
Step 1: Campaign details
This is what creators see on your marketplace card.
- Campaign name; the headline on your card, up to 80 characters. Use the offer, not your legal company name.
- Category; the niche your product sits in. Creators filter the marketplace by this, so pick the one your ideal creator would search for.
- Offer type; what you are actually selling: SaaS, Mobile App, AI Tool, Physical Product, Online Course, Subscription, and so on.
- Landing page URL; where the tracked link sends traffic. Send creators to the page that converts, not your homepage. If you forget the
https://, it is added for you. - Campaign description; at least 20 characters and at most 600. Creators read this before they apply, so say who the product is for and why it converts.
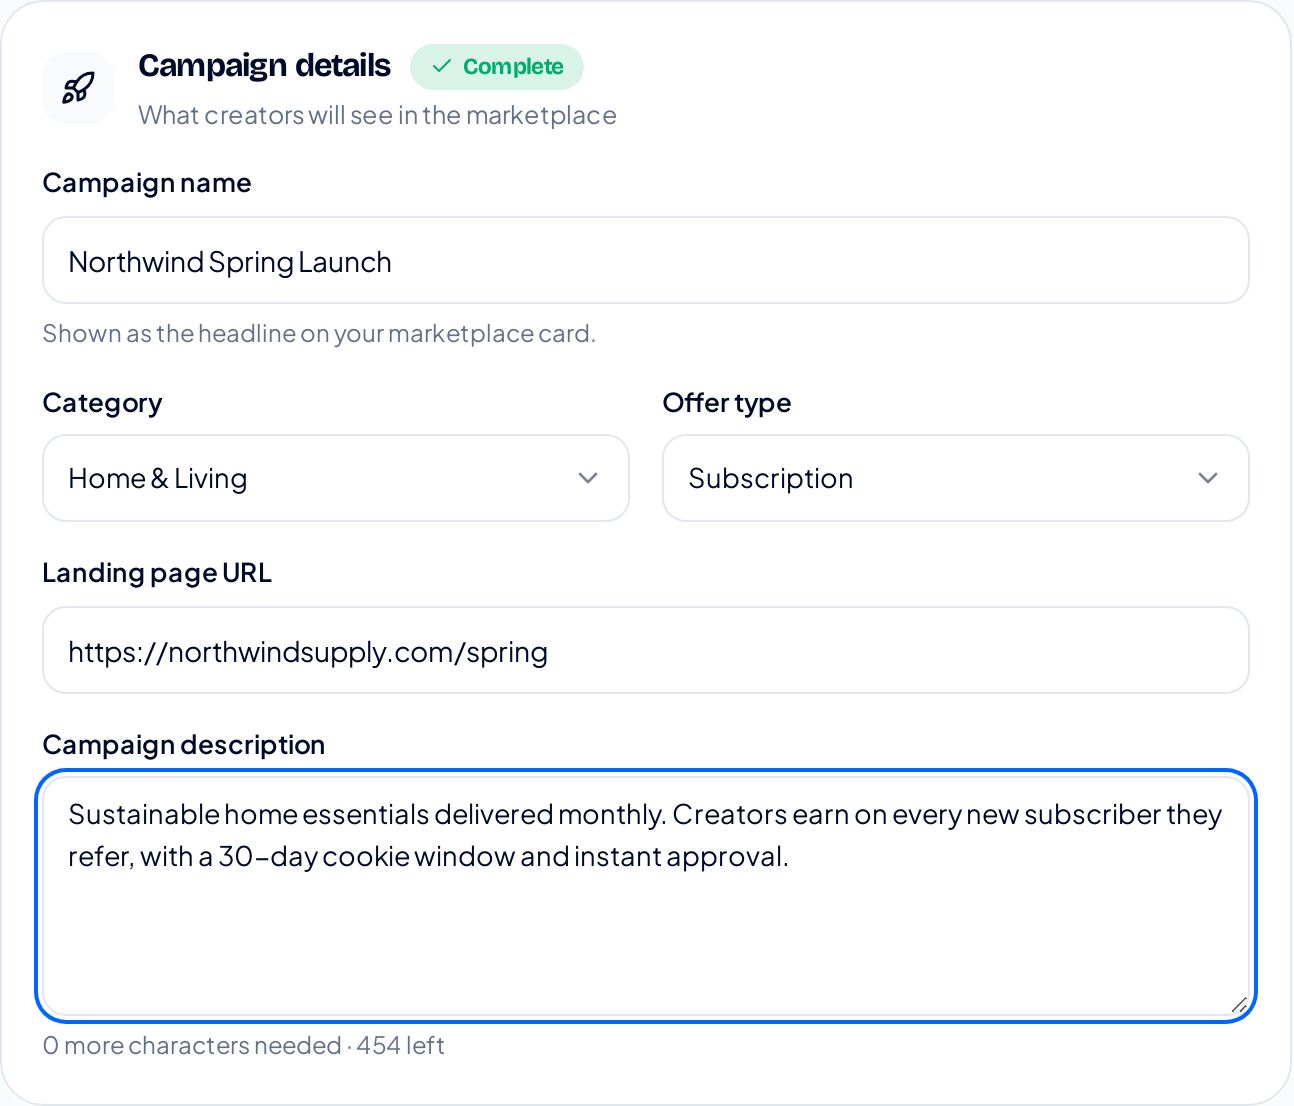
Campaign details, complete. The section turns green the moment every required field is filled.
Step 2: Promo materials (optional)
One field: a link to a folder of logos, images, videos, product screenshots and brand assets, Google Drive, Dropbox or anything else. Creators who have your assets publish faster and stay on-brand, so this is worth the two minutes.
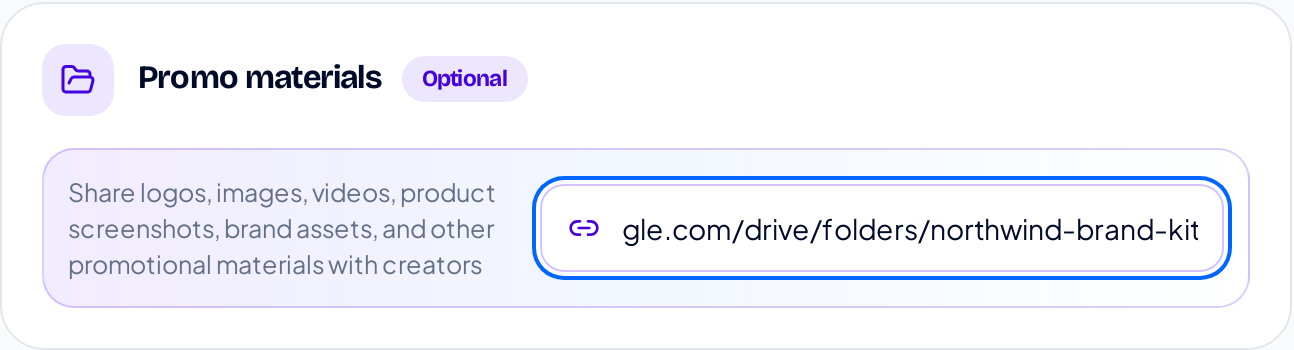
Paste one shared folder link. Optional, but it saves creators asking you for assets later.
Step 3: Campaign guidelines
This is the brief every creator reads before promoting you. Six questions are fixed, and all six must be answered:
- Who is this offer for?
- What should creators know before promoting?
- Who can I refer?
- What makes your product different?
- Which types of promotion are not allowed?
- Common mistakes you should know when promoting our offer?
Each answer holds up to 2,000 characters, and pasting from Docs, Notion, or ChatGPT keeps your bullet lists intact. An answered question earns an Answered tick and folds itself away, so the section stays short. You can also add up to ten of your own questions with Add your own question a custom question needs both a title and an answer to count.
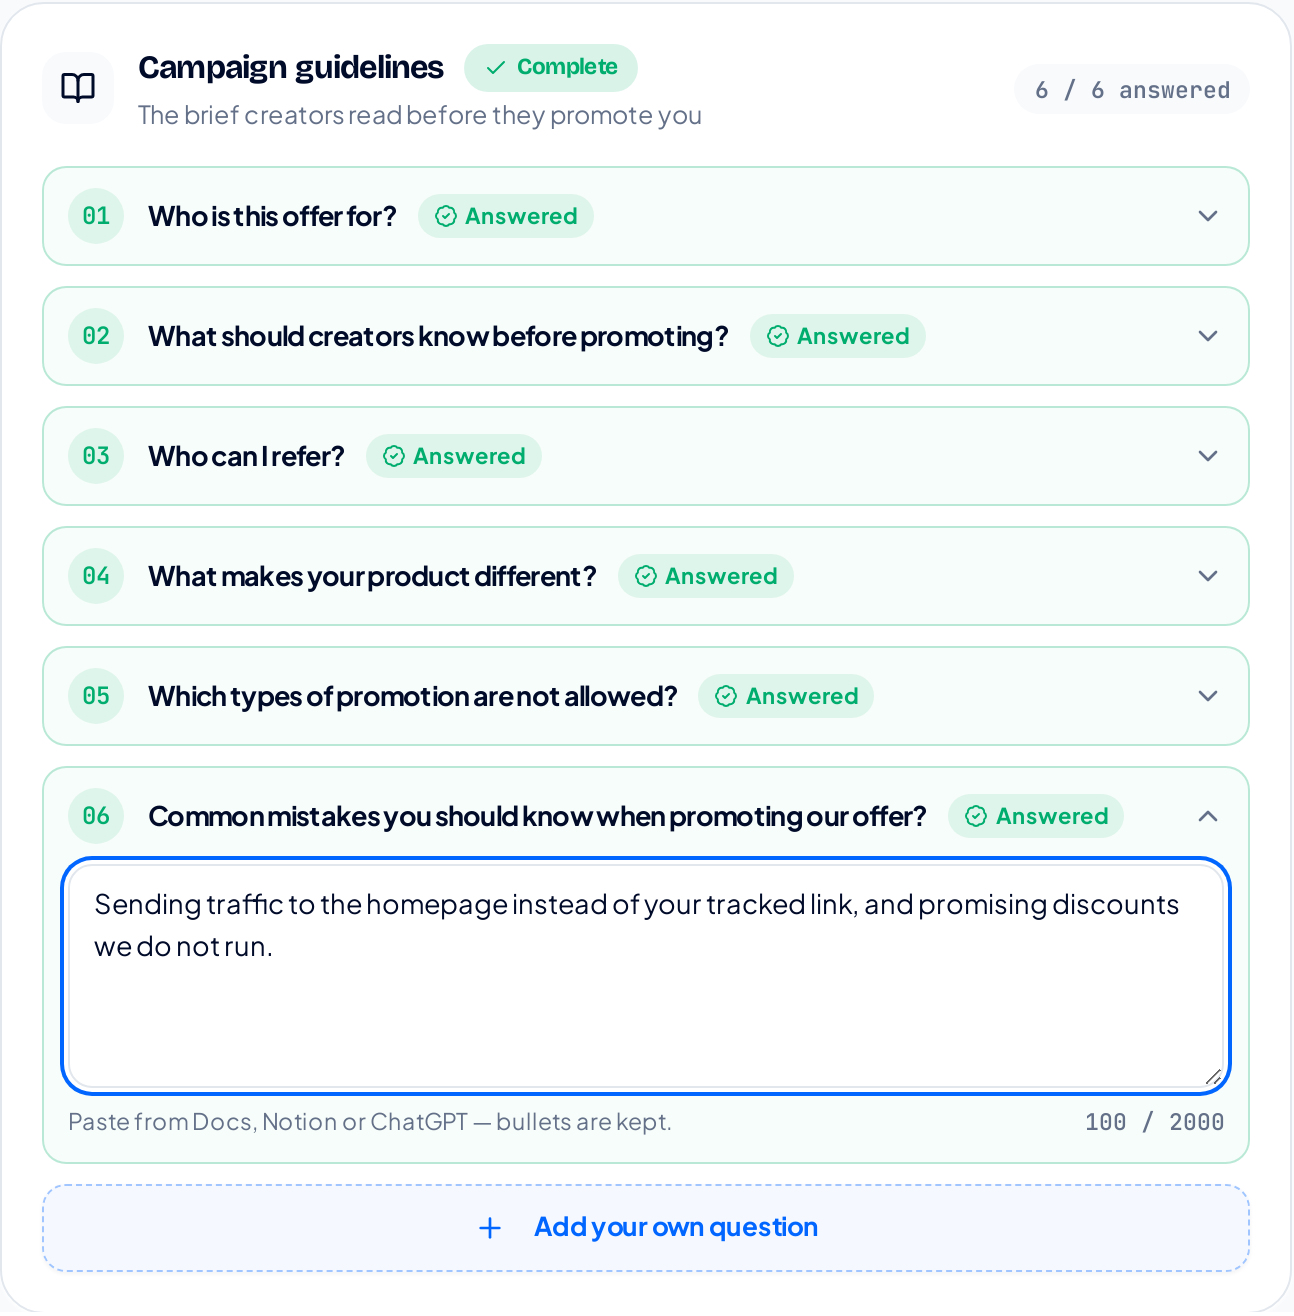
All six questions answered: 6 / 6, and the section is marked Complete.
Step 4: Allowed promotion channels
Pick where creators may promote you. All channels is one click and allows everything; otherwise choose the individual channels Newsletter, TikTok, Instagram, YouTubers, LinkedIn, X (Twitter), Twitch, Podcast, Blog, Discord, Reddit, Facebook, Telegram, WhatsApp, Pinterest, Website, Snapchat, Rumble. At least one is required. Your marketplace card shows the first three, then how many more you allow.
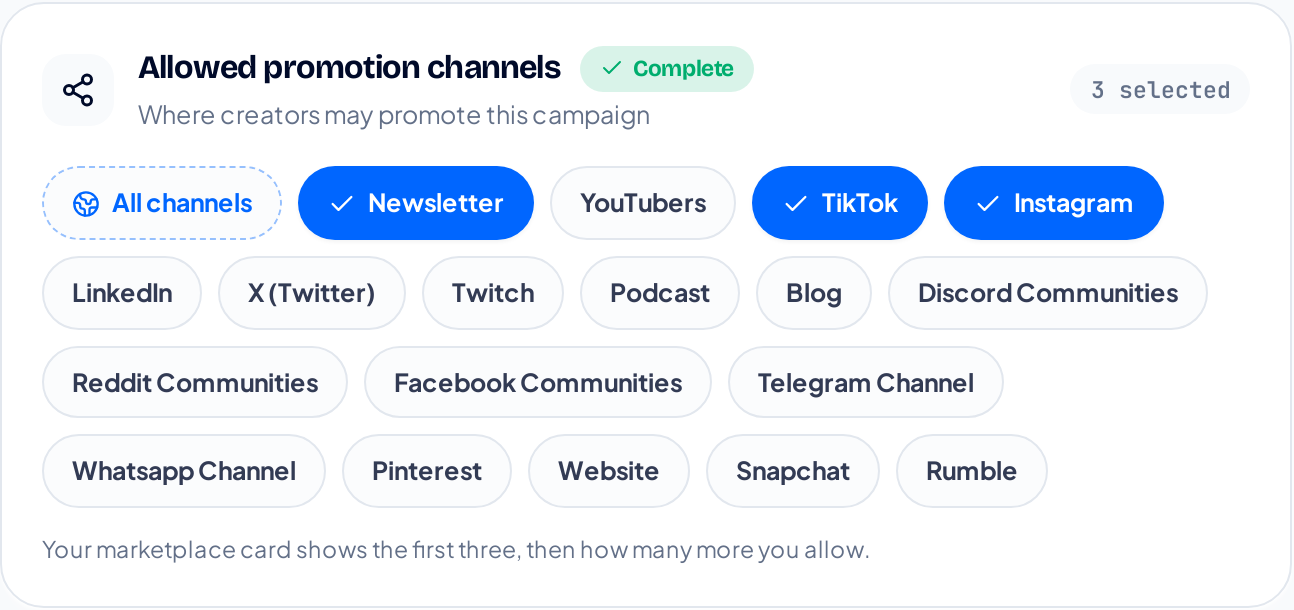
Three channels selected. Choosing All channels instead clears the individual picks.
Step 5: Campaign commercials
How creators earn. This section is where you choose your campaign type, and the fields change to match it.
- Commission; a percentage (up to 90%) or a fixed dollar amount (up to $100,000), depending on the model. The unit next to the field shows which one applies.
- Payout model; the campaign type. See the next section.
- Cookie window; how long a click stays attributed to the creator, from 1 to 365 days. 30 days is the default and a fair starting point.
- Approval; Instant lets creators start promoting immediately; Manual gives you more control but creators wait for your approval before they can start.
- Validation Rules; required, up to 2,000 characters. Define exactly what must happen for a conversion to qualify for a payout: refund windows, cancelled or duplicate orders, discount codes, minimum order value. This is the text you will point at if a commission is ever disputed, so be precise.
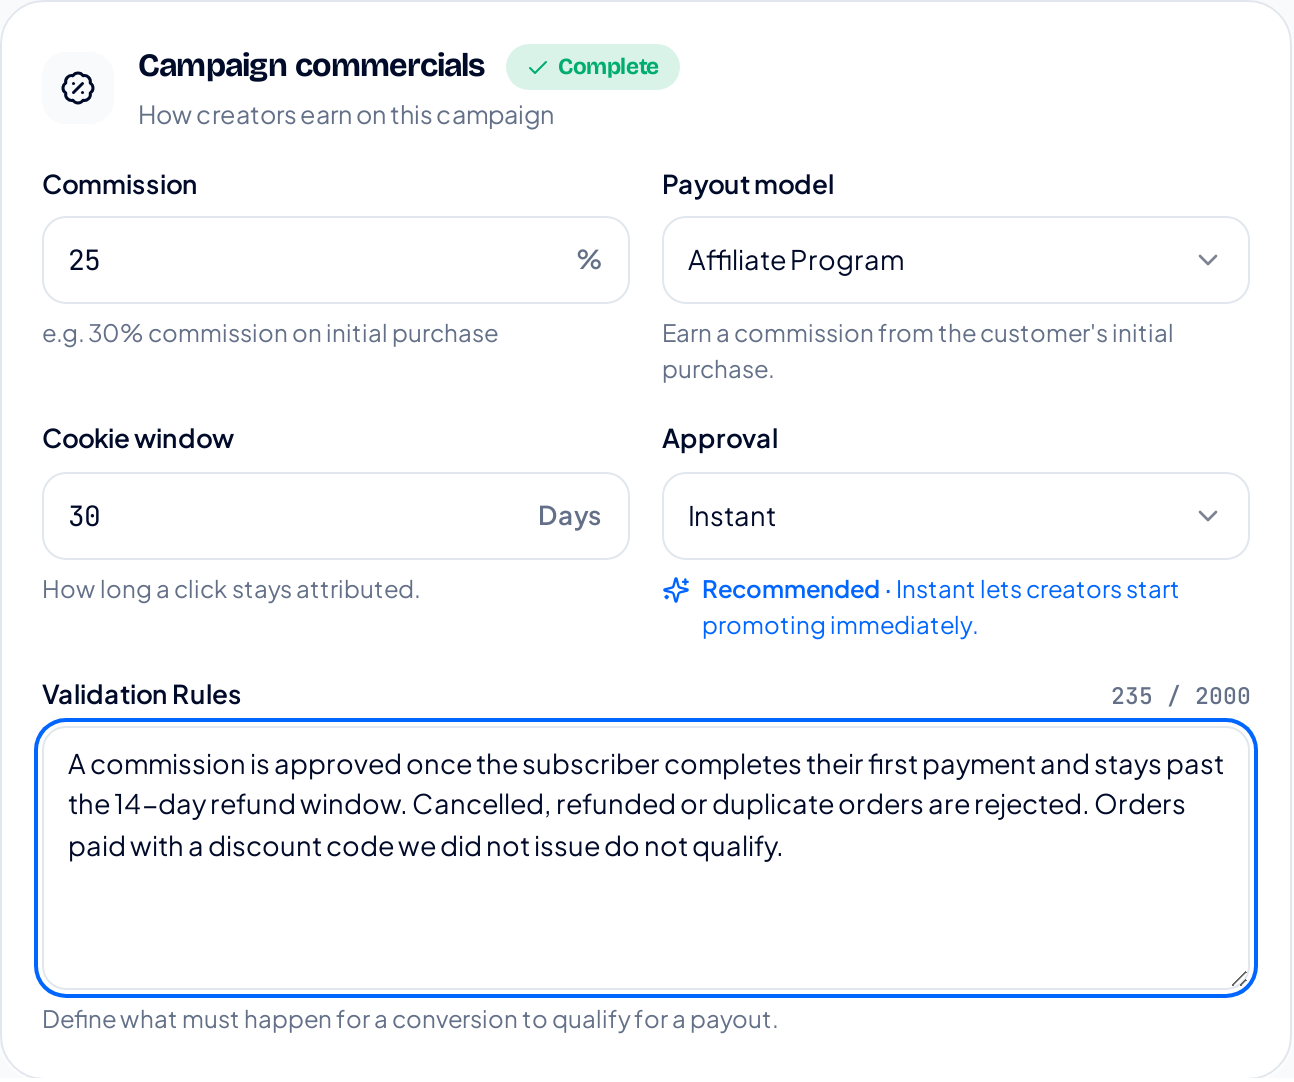
Commercials for an affiliate campaign: 25% commission, a 30-day cookie window, instant approval and written validation rules.
The four campaign types
The Payout model dropdown holds every campaign type on the platform. It decides what you pay for, when you pay it, and which extra fields appear.
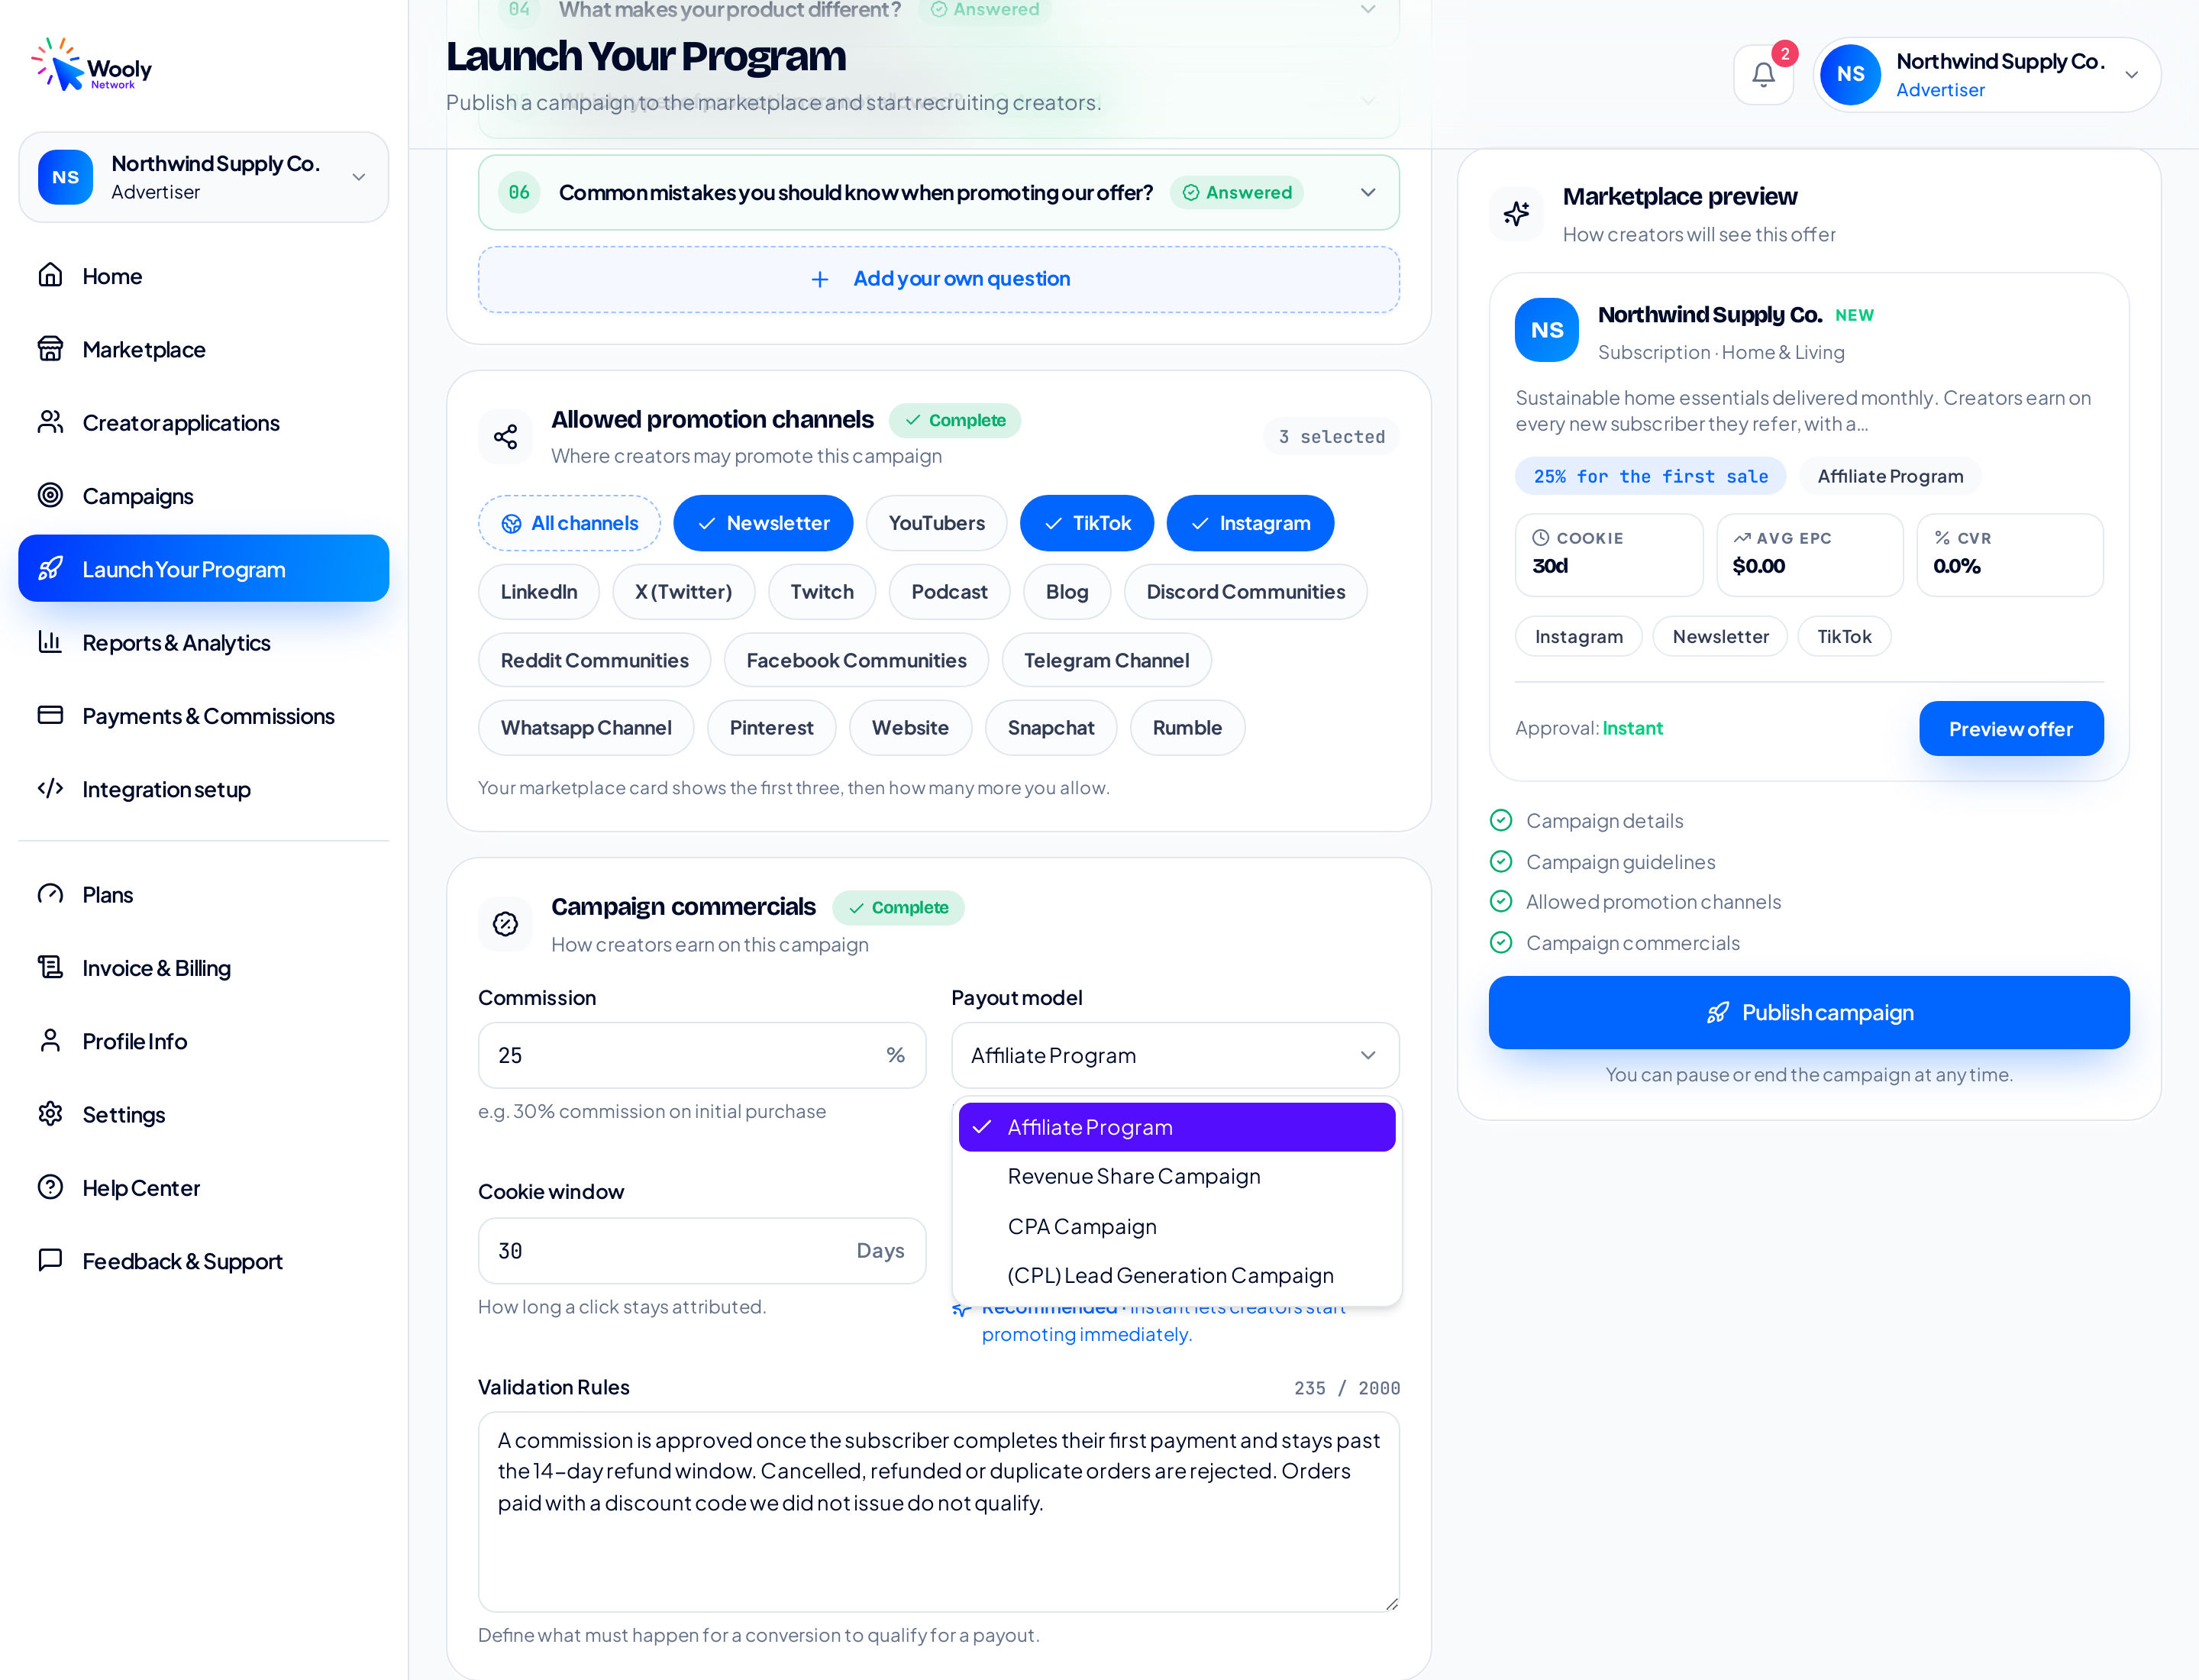
All four campaign types: Affiliate Program, Revenue Share Campaign, CPA Campaign and (CPL) Lead Generation Campaign.
| Campaign type | You pay | Commission is | Best for |
|---|---|---|---|
| Affiliate Program | On the customer's initial purchase | A percentage, for the first sale | One-off products and standard affiliate offers |
| Revenue Share Campaign | On recurring revenue, for a set period | A percentage, per sale, over the period you choose | Subscriptions and SaaS |
| CPA Campaign | When a new customer completes a purchase | A fixed amount, for the first sale | Predictable cost per acquisition |
| (CPL) Lead Generation Campaign | On a lead or signup | A fixed amount, per lead | Demos, trials, waitlists: anything before a sale |
1. Affiliate Program
The classic model: the creator earns a commission from the customer's initial purchase. You set a percentage, for example 30% on the initial purchase, and it is paid once per referred customer. Your marketplace card reads "25% for the first sale".
2. Revenue Share Campaign
You share recurring customer revenue with the creator for a defined period. Choosing this model adds one extra field, Creator Earnings Period: 1, 3, 6, 12, 18 or 24 months, or Lifetime. It answers the question "how long should creators receive a share of revenue from customers they refer?", and it appears on the card as "20% per sale for 12 months".
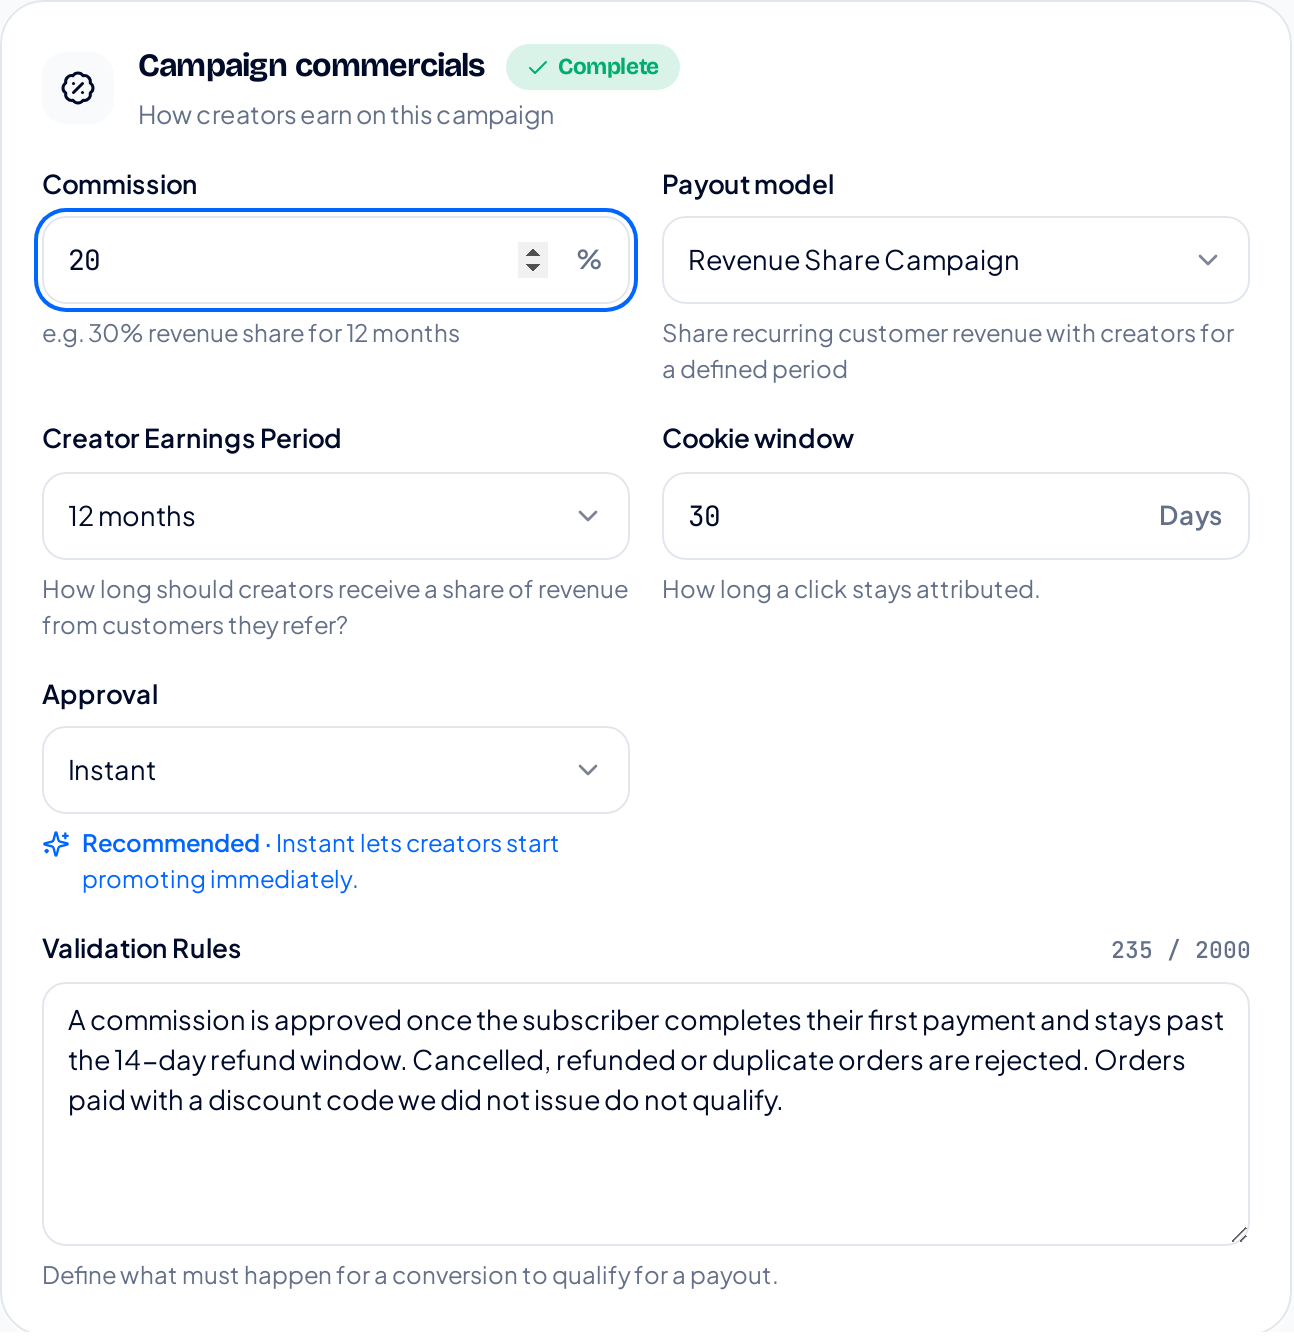
Revenue Share adds the Creator Earnings Period field. Twelve months is the default.
3. CPA Campaign
Pay a fixed amount when a new customer completes a purchase, for example $50 per acquisition. The commission field switches from % to $, and the card reads "$45 for the first sale". Use this when you want a known, capped cost per customer instead of a percentage of basket size.
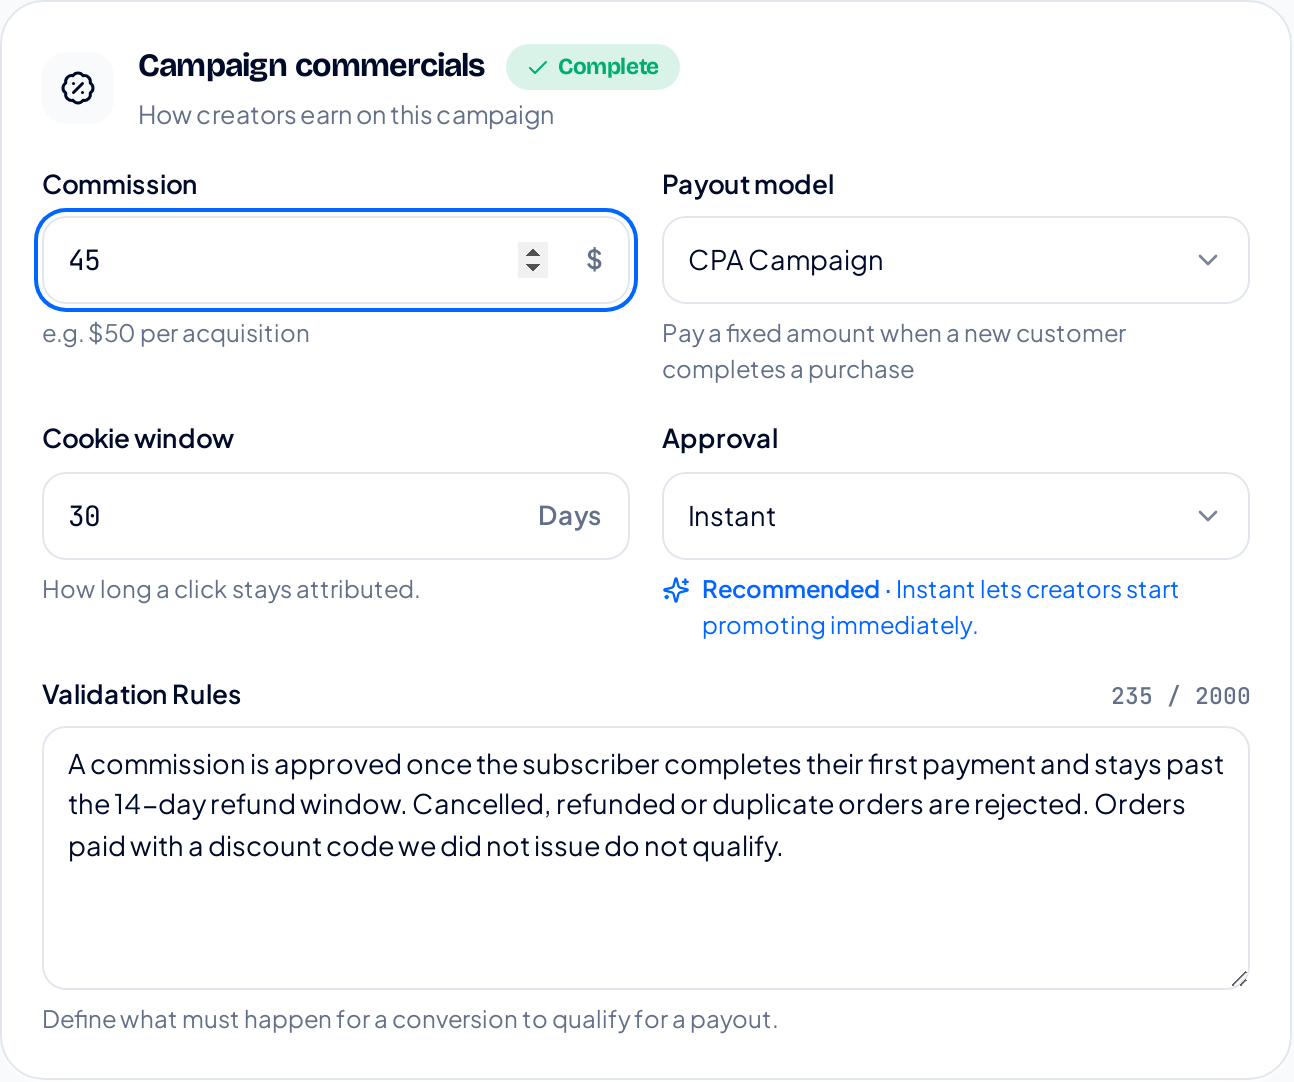
CPA pays a flat amount. The commission field switches to dollars.
4. (CPL) Lead Generation Campaign
Pay a fixed amount for a lead or signup, for example $20 per lead. This model adds an Event Options field so you can say exactly which action counts as a qualified lead.
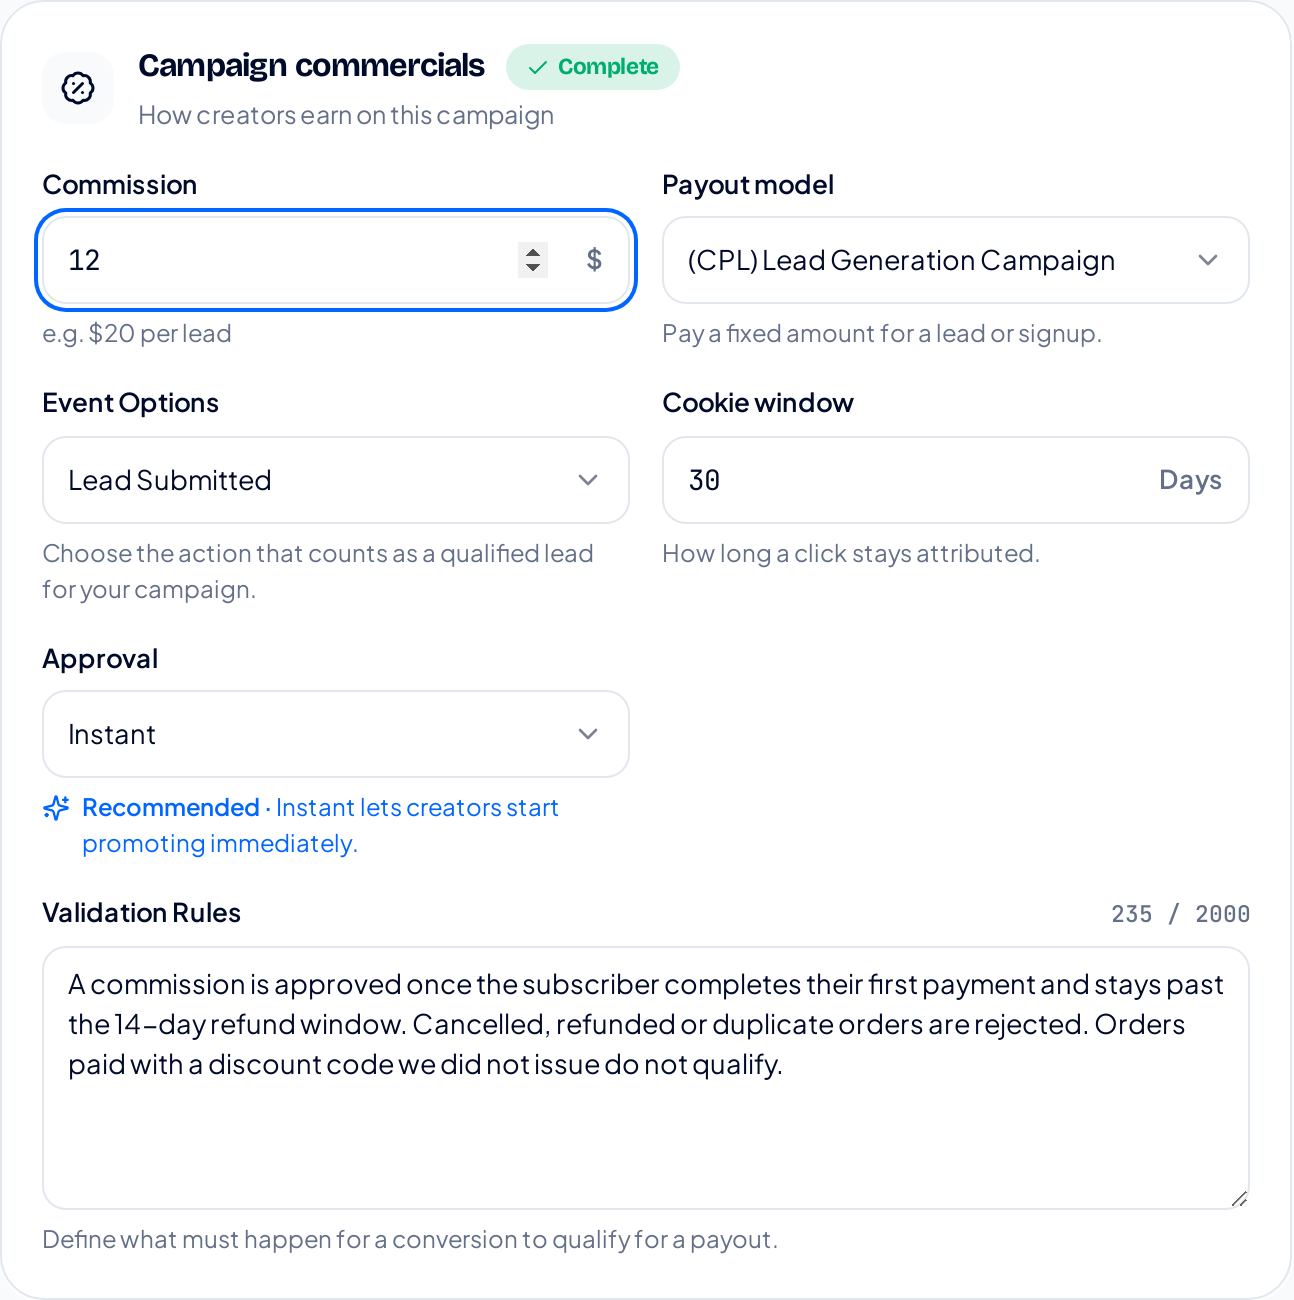
CPL pays per lead and adds the Event Options field.
The events you can pay on are: Lead Submitted, Free Trial Started, Account Signup, App Install, Demo Request, Application Submitted, Newsletter Signup, Contact Request, Qualified Lead, Waitlist Signup, Quote Request, Consultation Request, Registration and Resource Download.
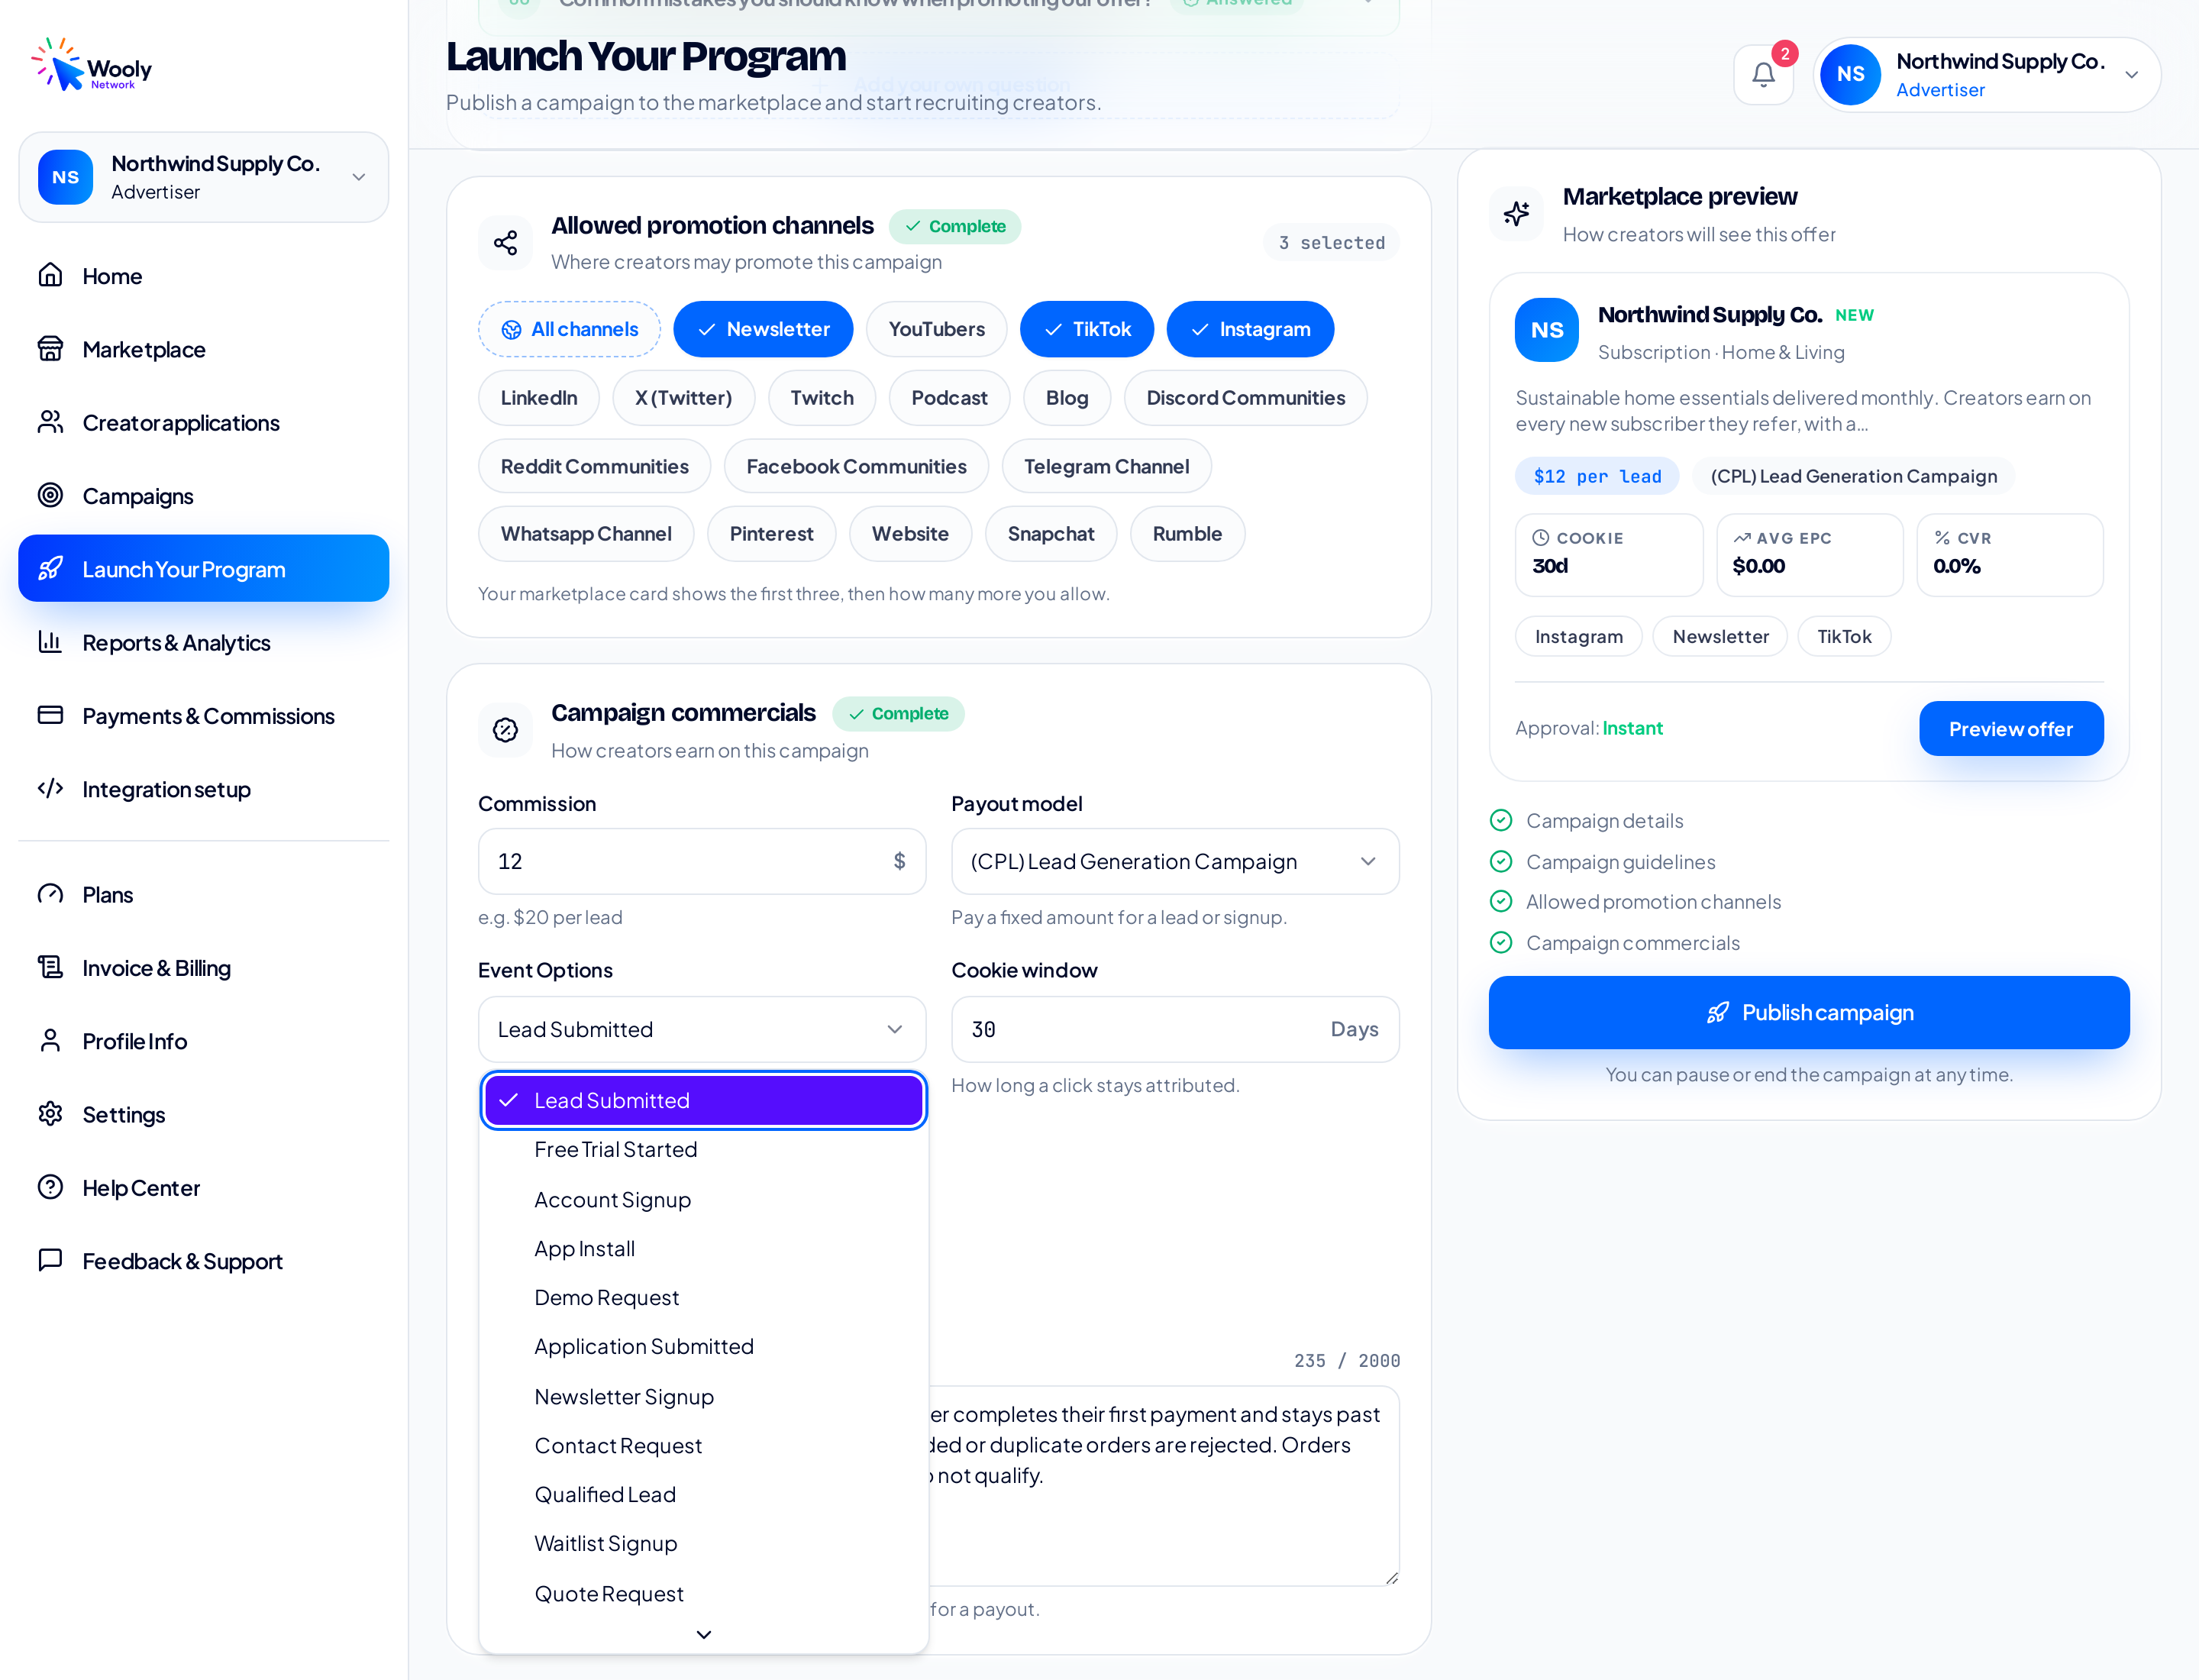
Pick the single action that counts as a lead; your validation rules should describe what makes it qualify.
Optional extras
Audience offer
A deal the creator can hand to their audience, a discount, a bonus, an exclusive. Choose a percentage or a fixed amount off, and how long it runs for (1 to 24 months, or Lifetime). The panel previews the exact line the audience will read, such as "New users get 20% off for 3 months". A campaign with an audience offer converts better because the creator has something to give, not just something to recommend.
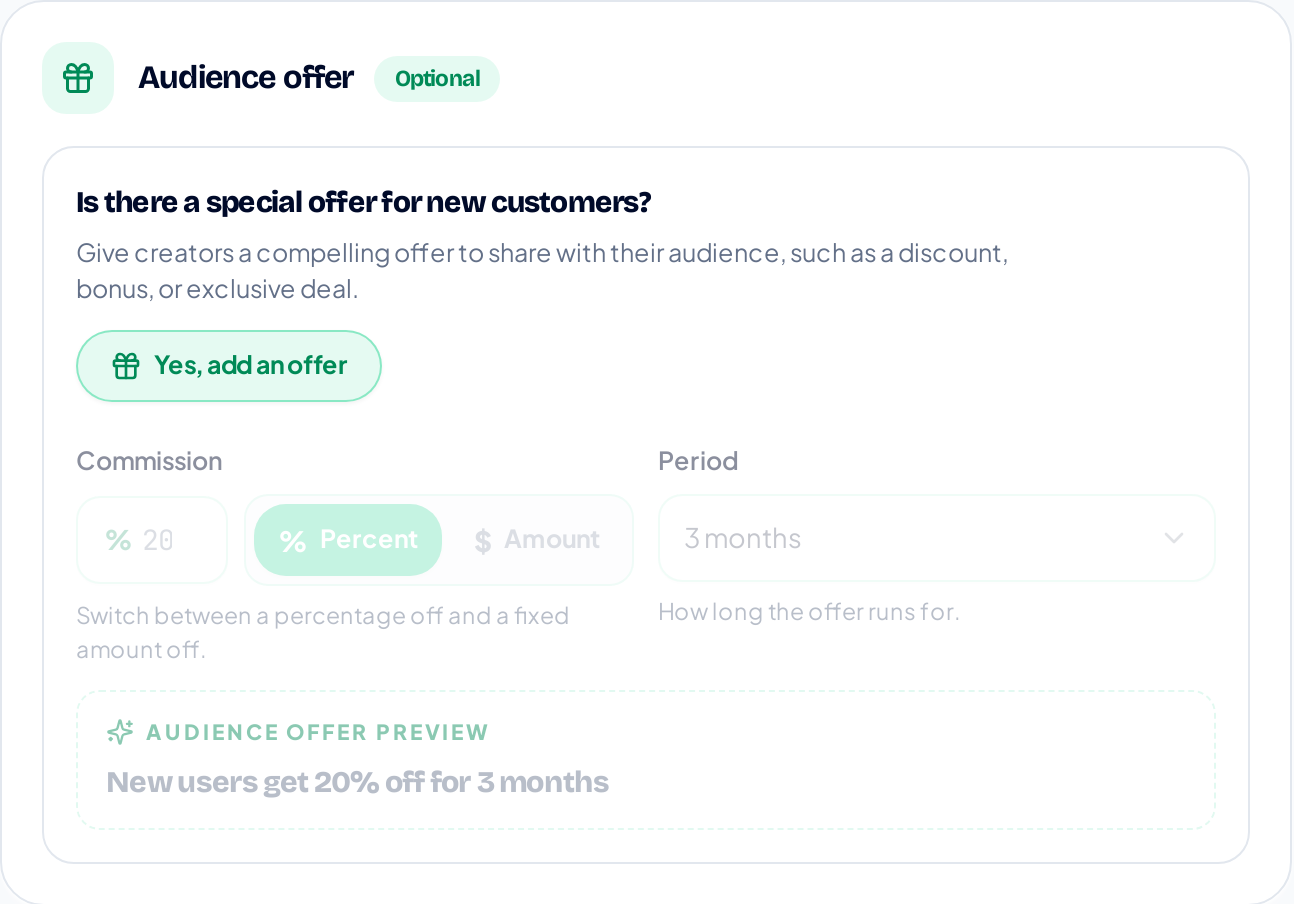
The audience offer stays closed until you open it with “Yes, add an offer”.
Campaign boosters
One optional highlight, shown to creators as a badge on your campaign: Limited-Time Campaign (creates urgency), Product Launch Campaign (attracts early adopters), Double Commission Campaign (boosts performance), Performance Bonus Campaign (rewards top creators) and Seasonal Promotion Campaign (for holidays and events). You can select one per campaign, and it needs its dates; a seasonal booster also needs its occasion.
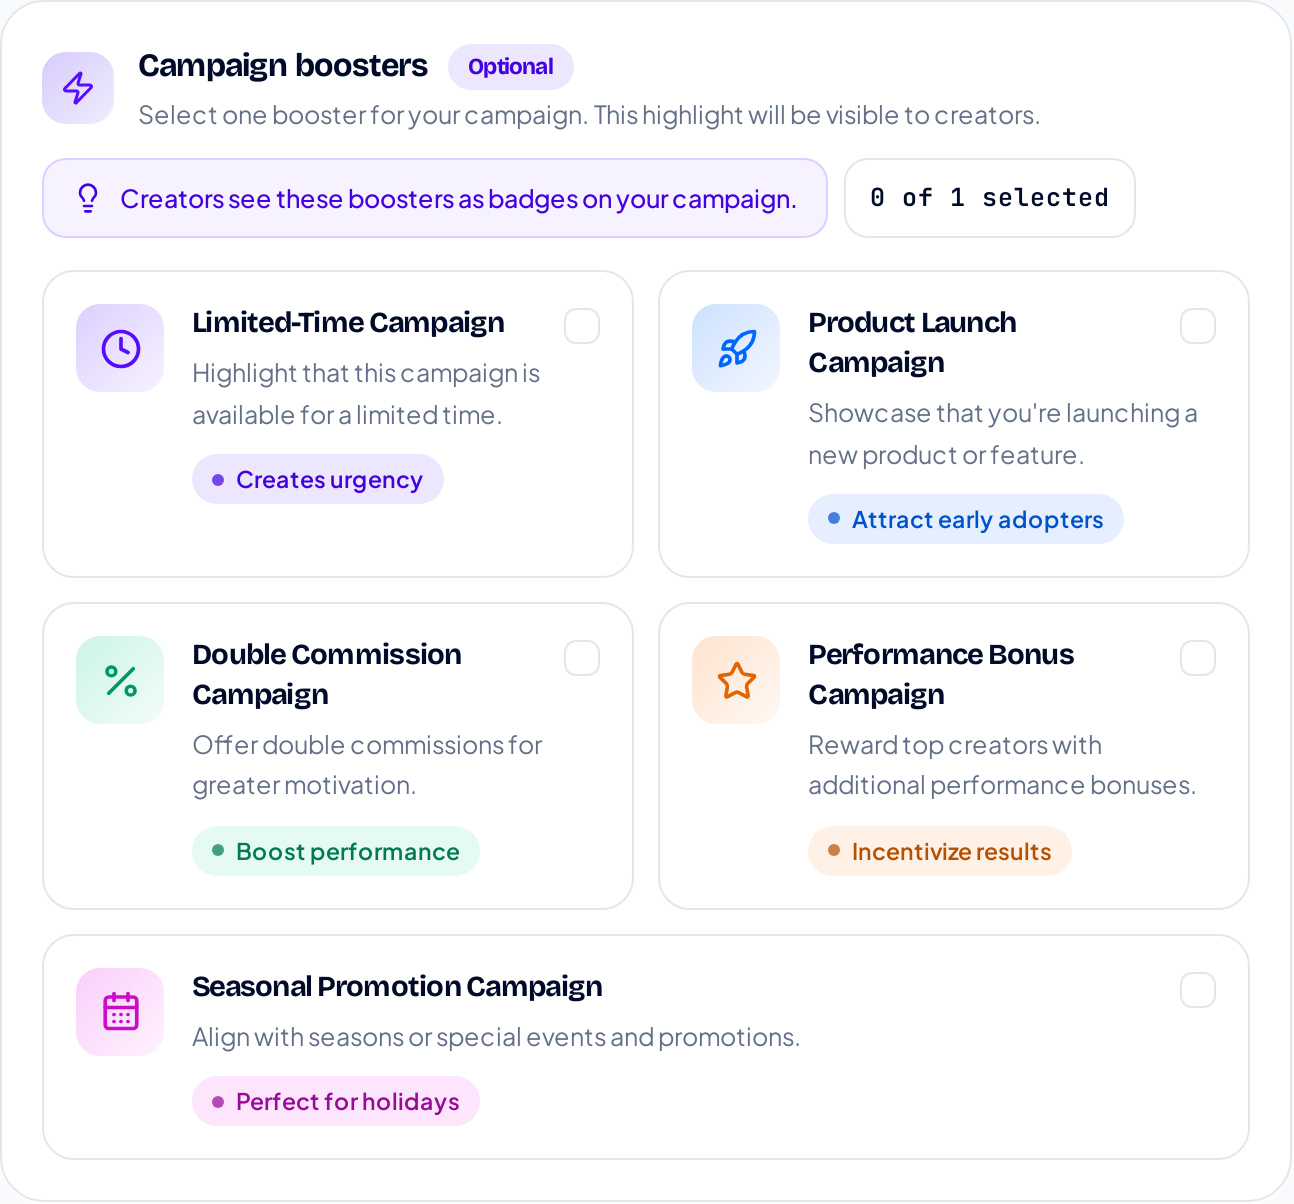
Five boosters, one per campaign. Creators see the booster as a badge on your card.
Audience offers and boosters are plan features; if your plan does not include them, the panels are visible but locked.
Step 6: Check the marketplace preview
The card on the right is exactly what creators will see: your brand, the category and offer type, your description, the commission line, the cookie window, your allowed channels and your approval setting. Click Preview offer to open the full offer page the way a creator reads it, guidelines and all.
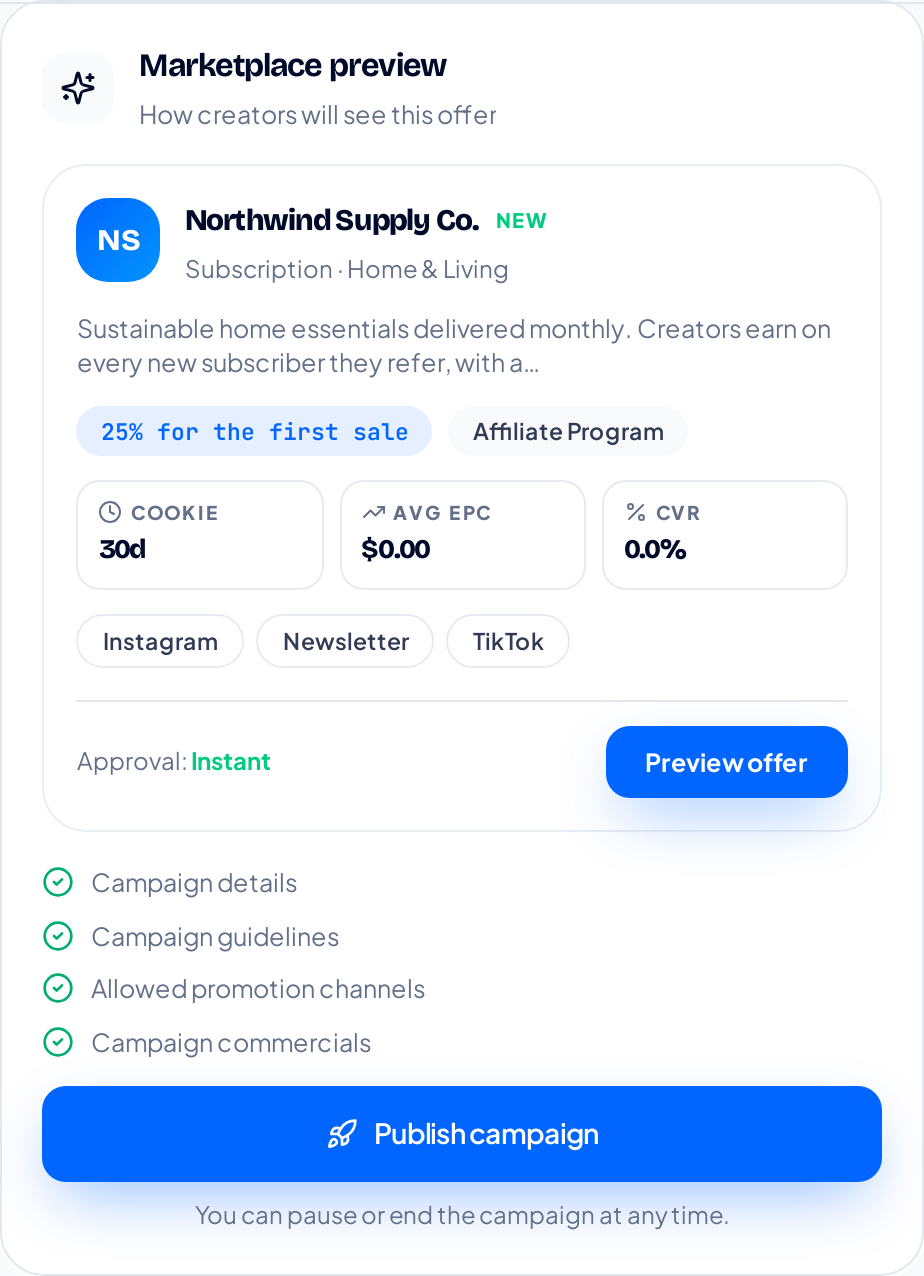
Four green ticks and the Publish campaign button is live.
If the button is still off, the checklist says why; it lists each incomplete section under "Still needed", for example "6 of 6 questions unanswered" or "at least one promotion channel".
Step 7: Publish
Publishing opens one last check. It restates the campaign model, commission, cookie window, approval, and asks you to confirm four things: the Terms & Conditions, that you have the budget to cover the commissions this campaign promises, that the campaign details and your tracking are accurate, and that you will review applications fairly and honour every valid conversion. A copy of what you agree to is saved to your account with the date.
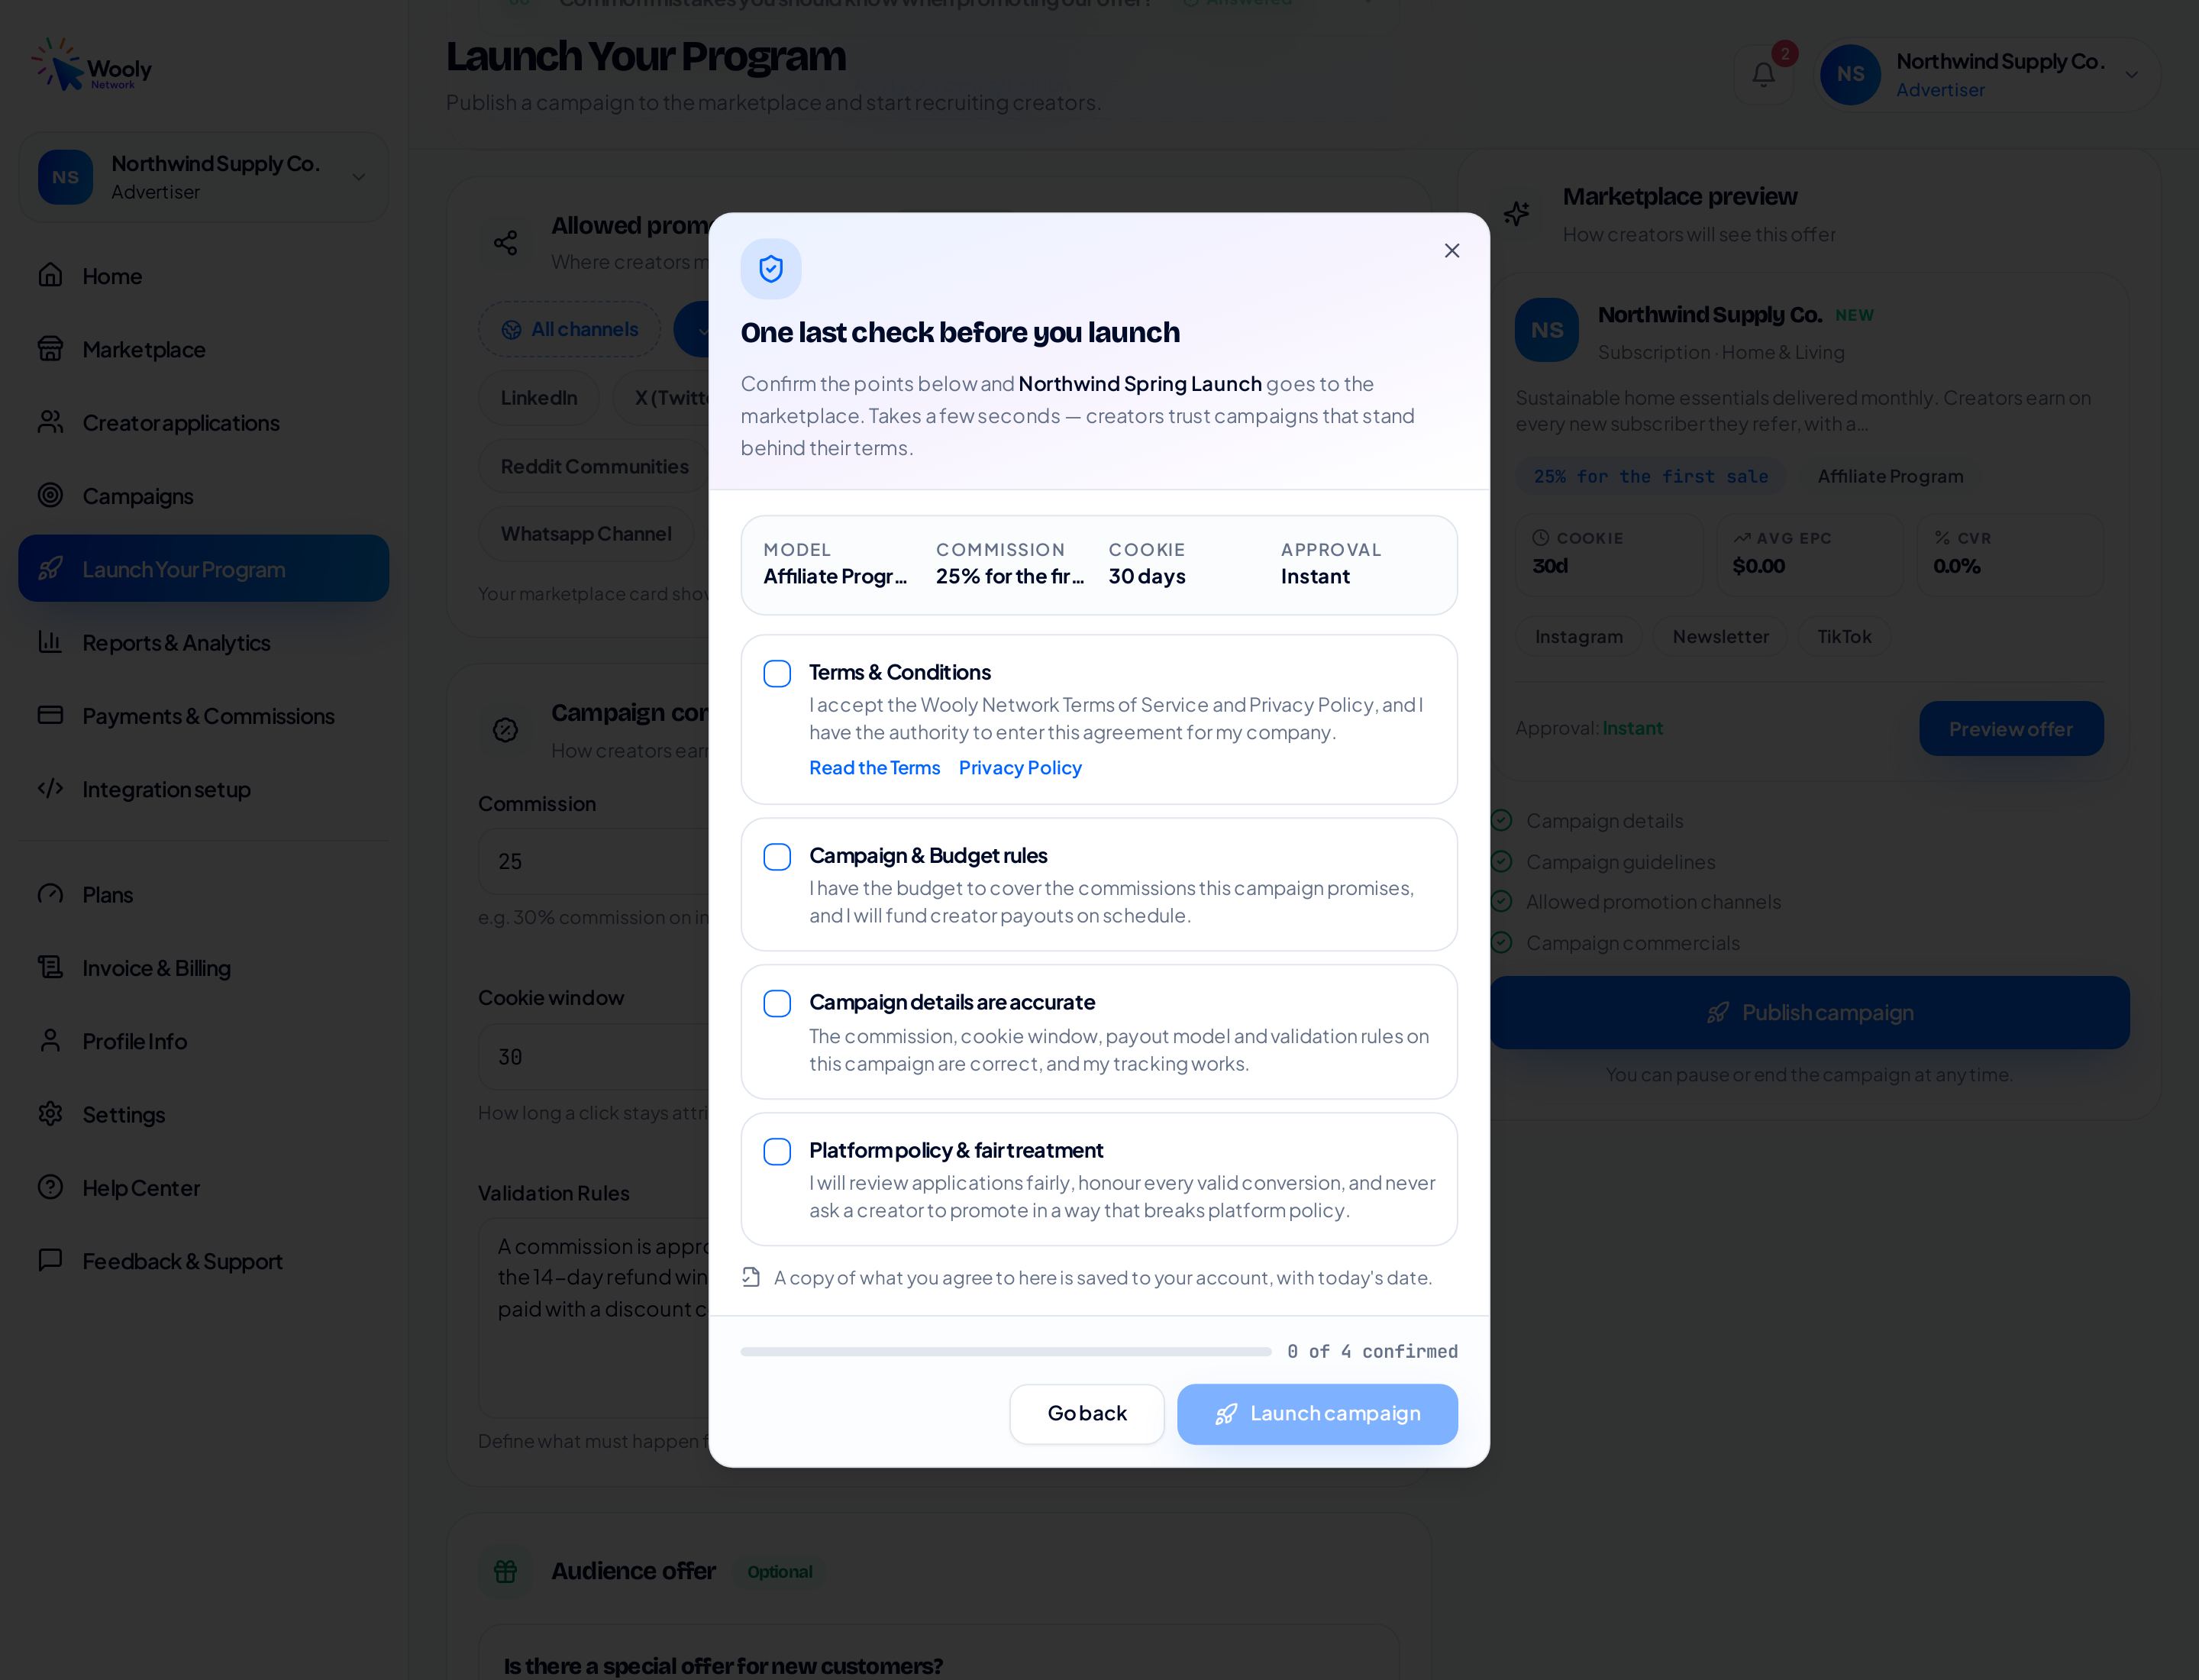
All four boxes must be ticked before Launch campaign turns on.
Tick all four, click Launch campaign, and your campaign goes live on the marketplace as soon as the system check finishes. You land on the Campaigns tab, where it will be listed.
After you publish
- Creator applications; with Manual approval, applications wait for you there. With Instant, creators start promoting immediately.
- Campaigns; pause or end a campaign at any time. Ending one frees a campaign slot on your plan.
- Reports & Analytics; clicks, conversions, EPC, and conversion rate per campaign.
- Payments & Commissions; approve conversions against your validation rules and pay within the terms you chose on Profile Info.
Quick checklist
- Plan active, brand profile finished, payment terms chosen.
- Campaign details: name, category, offer type, landing page, description.
- Promo materials link (optional, but recommended).
- All six guideline questions answered.
- At least one promotion channel.
- Commission, payout model, cookie window, approval and validation rules.
- Audience offer and a booster, if your plan includes them.
- Read the marketplace preview as a creator would.
- Confirm the four agreement points and launch.
Related reading
- How to approve the right creators — A walkthrough of the Creator applications tab: every status explained, what each button does, and exactly what changes for the creator when you press it.
- How to set commission payment terms — The waiting period creators see before they apply: what 30 and 60 days mean, and how to pick yours in four clicks.
- Understand your reports — A guided tour of the Reports & Analytics tab: what every panel shows, which number to act on, and how to read your programme in two minutes.
More from the Wooly Network Knowledge Library